Power Team Hydraulic Tools: 7 Quality Checks I Run Before Any Order Ships
-
Power Team Hydraulic Tools: 7 Quality Checks I Run Before Any Order Ships
-
1. Verify SPX Power Team branding before you open anything
-
2. Inspect the hydraulic pump—the gauge is not the whole story
-
3. Check hoses, fittings, and oil grade
-
4. Don't skip the 36-in pipe wrench
-
5. If air tools are involved, read the 110 PSI air compressor manual
-
6. Impact wrench sockets—do you actually need special ones?
-
7. Paperwork, warranty, and traceability—the last line of defense
-
Common mistakes, quick pass
-
1. Verify SPX Power Team branding before you open anything
Power Team Hydraulic Tools: 7 Quality Checks I Run Before Any Order Ships
I'm a quality and brand compliance manager at an industrial equipment distributor. I review every Power Team hydraulic unit that lands in our warehouse—roughly 180 a year on a smooth year, closer to 220 when things are busy. Since I implemented our verification protocol in 2022, I've rejected about 12% of first deliveries. Some quarters that number drops closer to 10%; when we're onboarding a new supplier line it can creep up to 15%.
The reasons are rarely catastrophic. Usually it's spec drift—pressure ratings that don't match the paperwork, non-branded fittings mixed into a shipment, oil that's the wrong grade. Small things individually. But they add up, and they're the kind of thing that erodes a brand's reputation once the customer has the tool in their hands.
If you're the person responsible for ordering or receiving hydraulic equipment for a maintenance team, this is the checklist I use. Seven steps. Run them in order. Unless your warehouse is significantly larger than ours, you can get through it in about 45 minutes. That's 45 minutes compared to two weeks of return headaches.
1. Verify SPX Power Team branding before you open anything
People assume that a box with "Power Team" on it contains genuine Power Team product. What they don't see is that grey-market vendors sometimes source lookalike units and rebrand the packaging downstream.
Start with the outer box:
- The lot number should match the packing slip. If it doesn't, stop there
- Check the logo font and spacing against a known reference—reprinted labels tend to have heavier strokes
- Serial stickers should correspond to an SPX-published serial range
If any of those three fail, don't open the crate. Call the vendor first.
2. Inspect the hydraulic pump—the gauge is not the whole story
Everyone looks at the pressure gauge first. It's the obvious thing. But a gauge reading tells you maybe half the story.
During intake, I run three checks on every pump before it goes to inventory:
- Cycle the pump with no load attached. Listen for a grinding undertone. That usually signals internal valve damage
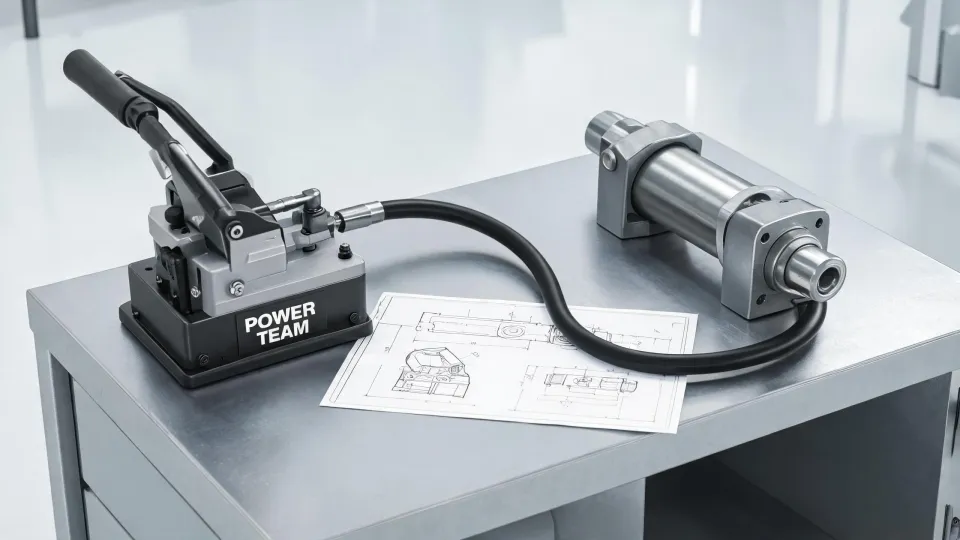
- Confirm the nameplate rating against the purchase order. Our SPX Power Team pumps typically run at 10,000 PSI, but not every model does, and we've had two shipments where the model number didn't match the rating on the plate
- Check the fittings—threads should be clean, with a light oil film and no metal shavings
If the gauge reads correctly but the pump sounds off, reject it anyway. We learned that the expensive way. A clearance-damaged pump cost us around $2,100 to repair and pushed back a client delivery by ten days.
3. Check hoses, fittings, and oil grade
This is the step most people skip. Hoses look fine as long as there's no visible bulge or crack. But hoses have a shelf life, and they can sit in a supplier's warehouse for years.
Look for the date code printed on the hose jacket. If it's more than 36 months past the manufacture date, request a swap. In our experience, hoses older than three years fail at noticeably higher rates within the first twelve months of service.
Then the oil. If the pump is pre-filled, confirm the grade. Most SPX Power Team pumps ship with ISO 46 anti-wear hydraulic fluid. If the vendor says "general-purpose hydraulic oil," that's a red flag. Push back.
4. Don't skip the 36-in pipe wrench
Manual tools get glossed over because they seem simple. But they're the easiest thing in the order to get wrong.
For a 36-in pipe wrench, I check three things:
- Open and close the jaws. The tension should feel even—no catches, no slack
- Lay the handle on a flat surface. Any bowing means the casting or forging is off
- Inspect the jaw teeth. They should be sharp and uniform. Worn teeth mean the tool has been used
Used tools sold as new is more common than you'd think. Some suppliers repackage returns. The teeth will tell you the truth.
5. If air tools are involved, read the 110 PSI air compressor manual
If the order includes pneumatic tools or the compressor that feeds them, get the 110 PSI air compressor manual and actually read the output curve. Some units labeled at 110 PSI peak deliver closer to 90–100 PSI at continuous duty.
If the spec sheet says 110 PSI and your air tool needs 110 PSI to hit its rated torque, you're already behind. Never mind peak torque.
I add this line to every new equipment intake form now: a 110 PSI compressor must hold close to 110 PSI for at least 10 minutes without noticeable decay. If it can't, swap it.
6. Impact wrench sockets—do you actually need special ones?
This question comes up with every new impact wrench order. The short answer: depends on how you're using it.
If you're buying an impact wrench for light assembly work with standard torque ranges, chrome-vanadium sockets can hold up in some cases. But once torque climbs past around 500 ft-lbs—which is where most 1-inch drive impact wrenches live—you need impact-rated sockets. Standard sockets can shatter. That shattering is dangerous.
Practical approach: add a line to your purchase order specifying "impact-rated sockets included." On our floor, every socket-related injury trace back to someone grabbing a standard socket because the impact-rated one wasn't within arm's reach.
7. Paperwork, warranty, and traceability—the last line of defense
Once everything checks out, do three final things:
- Scan serial numbers into your asset system. Not into a folder on someone's desk
- Confirm the warranty start date matches the invoice date, not the ship date
- Get the warranty terms confirmed in writing. Email is fine. You don't need a lawyer for this
One of my biggest regrets: early on, we had a batch of Power Team hydraulic pumps where the warranty start date was six months before we received them. The vendor said "ship date." The contract didn't specify. When one unit failed two months into service, we ate the repair cost ourselves.
Every contract now specifies that warranty coverage begins on receiving date. That lesson cost us a few thousand dollars. I don't intend to pay for it twice.
Common mistakes, quick pass
From our internal service records, three issues show up more often than anything else:
- Pump passes the gauge test but has internal wear that only shows up under load
- Hose and fitting choices default to non-branded parts to save a little money—then blow out at the worst time
- Impact wrenches paired with standard sockets because the operator didn't want to walk back to the tool crib
The last one sounds small, but it's serious. When I switched our team from budget fittings to properly rated components a few years back, our in-service failure rate dropped noticeably. The cost difference per shipment was minor. The downtime savings weren't.
The checklist isn't long. But running it consistently is the difference between a tool that works when your team needs it and one that fails on the job. Quality at the intake stage is brand perception on the other end.

Amara Nwosu
Amara Nwosu is an independent hydraulic tool and pump systems analyst covering jacks, cylinders, pullers, torque wrenches, hand pumps, power pumps, and porta-power equipment. She applies ISO 4413 safety principles while examining rated pressure, cylinder force, stroke, oil volume, flow, return type, hose condition, load holding, pressure loss, and relief protection. Her technical guides help maintenance and construction teams configure compatible systems, verify safe capacity, and diagnose slow or unstable operation.