Power Team Buyer's Checklist: 5 Steps to Smarter Hydraulic Pump & Tool Spending
-
Step 1: Verify the Power Team Logo and Model Markings Before You Pay
-
Step 2: Size the Hydraulic Pump to the Load, Not to the Catalog Maximum
-
Step 3: Understand What a Brushless Impact Wrench Actually Does
-
Step 4: Stock a Compact Tool Set for the 85% of Jobs That Are Simple
-
Step 5: Read the Parts Diagram Before You Order the Replacement
-
Three Mistakes That Still Show Up on Our Invoices
If you're the one who signs purchase orders for a maintenance crew or industrial facility, this checklist is for you. It's a five-step process I've built over six years of managing our tooling budget—roughly $180,000 in cumulative spend, tracked line by line in our procurement system. I've negotiated with dozens of vendors, documented every order, and made most of the mistakes I'm about to warn you about. (Honestly, more of them than I'd like to admit.)
The categories here cover the purchases that show up on most of our POs: Power Team hydraulic pumps and jacks, brushless impact wrenches, compact tool sets, and replacement parts like seals and blades. Run through the five steps in order and you'll avoid the expensive lessons I learned the hard way.
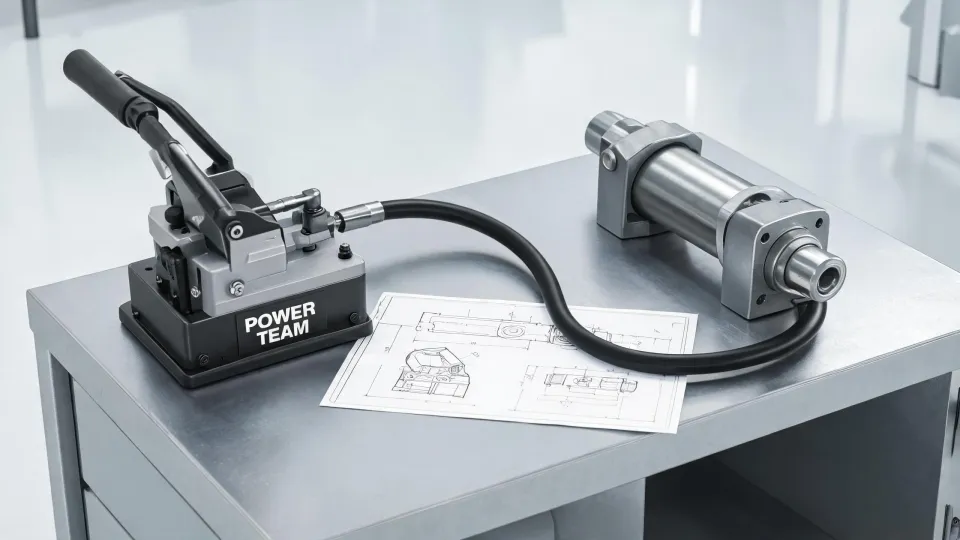
Step 1: Verify the Power Team Logo and Model Markings Before You Pay
When I first started managing vendor relationships, I assumed the lowest quote for a branded item was still a genuine item. A $1,200 counterfeit cylinder taught me otherwise. The counterfeits didn't show up in the unit price comparison—they showed up in the failed load test.
Here's the brand check I run on any Power Team product now:
- The logo. Genuine units carry a consistent embossed or stenciled Power Team logo in a fixed position. If the logo is a sticker and it's peeling at the corners, treat that as a red flag.
- The model number. Cross-reference it against the spec sheet on the manufacturer's official site. Counterfeit units tend to use "close enough" model numbers that match nothing in the catalog.
- The serial plate. SPX tracks serial numbers on its product lines. A missing or scratched-off serial plate is a deal-breaker, no matter how good the price looks.
If a supplier responds to the logo question with a vague answer, move on. Per FTC advertising guidelines (ftc.gov), a claim like "industrial-grade" or "genuine OEM" has to be substantiated with evidence. Real distributors can provide it. Others usually stop replying after you ask.
Step 2: Size the Hydraulic Pump to the Load, Not to the Catalog Maximum
The most expensive mistake on a hydraulic pump isn't choosing the cheapest option. It's choosing the biggest one.
A 10,000 psi Power Team hydraulic pump looks great on paper. But if your cylinders are rated for 5,000 psi, you're holding a premium-priced hazard. The pump can push the cylinder past its rated capacity and cause a catastrophic failure. (Surprise, surprise—that detail rarely makes it into the sales presentation.)
The selection process I use:
- Total the actual load in tons for your heaviest routine job. Not the once-a-year job—the routine one.
- Check the pressure rating of the cylinders you'll pair with the pump.
- Choose a pump pressure that covers the load with 20–25% headroom, not 200%.
- Match the power source (manual, electric, or air) to your actual site conditions and crew habits.
It's tempting to think "more capability equals more flexibility." But oversizing a hydraulic pump costs you at purchase, at every service interval, and in operator confidence. The correctly sized pump is cheaper to buy, cheaper to maintain, and safer to run.
Step 3: Understand What a Brushless Impact Wrench Actually Does
Let's settle a terminology question that causes endless confusion in our sector: what is a brushless impact wrench?
Basically, a brushless impact wrench replaces the traditional carbon-brush motor with an electronically commutated motor. No brushes to wear out, better runtime per battery charge, and the controller can adjust torque delivery. The technology is genuinely good.
But I'll defend this position to any other cost controller: don't assume brushless is automatically the right choice for every line item.
In our shop, a brushed impact wrench handles the occasional fastener without any issue. Brushless earns its premium where the tool runs daily for hours—fleet maintenance, production lines, field service. If your crew uses an impact wrench twice a week, the durability advantage won't show up in your maintenance costs.
What we evaluate before buying:
- Torque rating in ft-lb. Ask whether the number was measured with a fully charged battery. Our first brushless wrench delivered about 30% less torque with a partially discharged pack—that discrepancy cost us a stubborn lug nut and a late delivery.
- Battery platform. Standardize on one platform across your cordless tools. (I really should have done that years ago. We're still running three different chargers in the tool crib.)
- Control modes. Multiple speed and torque settings are useful if your crew works on different materials. Otherwise, skip the premium.
- Warranty terms. The warranty length usually tells you what the manufacturer knows about the tool's expected life.
The bottom line: brushless is a durability upgrade, not a magic performance multiplier.
Step 4: Stock a Compact Tool Set for the 85% of Jobs That Are Simple
This is the step most buyers skip, and it's become the one that saves us the most money.
When I audited our 2023 spending, I sorted every maintenance ticket by complexity. Eighty-five percent were simple tasks: replacing seals, tightening fittings, swapping filters, reconnecting wiring. None of those required a 100-ton press or a 10,000 psi pump. What they actually needed was a compact tool set within arm's reach of the workbench.
The oversimplified advice you often hear is "buy the biggest, toughest tools you can afford and you're set." That advice ignores how maintenance crews really work. If a technician spends ten minutes walking across the shop to find a socket wrench, that's billable time gone.
What we stock in our compact kit now:
- Metric and SAE socket sets with ratchet handles
- Adjustable torque wrenches in 3/8" and 1/2" drive
- Hex and Torx key sets
- Pliers, wire cutters, and a magnetic pickup tool
- A small inspection mirror for tight spaces
The whole kit cost us under $300. It paid for itself in the first quarter by cutting average repair time by roughly 20%.
Step 5: Read the Parts Diagram Before You Order the Replacement
Last summer, our facilities team needed a new blade for the 40V lawn mower we use to keep the site presentable. I "knew" the part number from memory and typed it into the supplier's website. I was one click away from ordering.
So glad I pulled up the 40V lawn mower parts diagram first.
The diagram showed a detail I had completely missed: the mower deck comes in two variants, each using a different blade length. If I had trusted my memory, we'd have received the wrong blade, burned another week on return shipping, and paid a restocking fee. A classic case of "saving time" that actually cost both time and money.
The rule I follow now: for any replacement part, download the official parts diagram first, locate the part by its reference number, and match that number against the diagram before approving the order. This applies beyond lawn mowers. The seal kit we once ordered for a Power Team pump looked exactly right in the product photo. The thread was wrong. The parts diagram I had skipped would have shown the correct kit for our specific pump model—the product number was one digit different.
Three Mistakes That Still Show Up on Our Invoices
If you skip everything else, read this section.
1. Ignoring total cost when comparing quotes. The lowest unit price is rarely the lowest total cost. Compare shipping, handling, minimum order quantities, and restocking terms. We once paid $40 in freight to get a $3 seal delivered overnight. USPS would have handled it in a First-Class large envelope for $1.50 as of January 2025, according to their published rate schedule (usps.com). Small line items add up faster than you think.
2. Trusting "free" add-ons. The "free setup" we were offered on a hydraulic pump ended up costing us $450 in hidden fees when the technician returned twice for adjustments outside the free scope. "Free" is the most expensive word in procurement when you don't read the fine print.
3. Waiting for a breakdown before buying spare parts. Emergency orders always cost more—both in price and downtime. We built a critical spares list for our most-used equipment and stocked the top 10 items. Since then, average equipment downtime per failure has dropped by 30%.
An informed customer asks better questions and makes faster decisions. That's what this checklist is for—so you can buy smart, document your reasoning, and defend your budget when the CFO asks why an order costs more than the cheap alternative.

Maren Jorgensen
Maren Jorgensen is an independent hand tool and torque applications analyst covering wrenches, pliers, screwdrivers, hammers, sockets, ratchets, hex keys, and tool sets. She applies ISO 6789-1 torque-tool conformance principles while examining jaw capacity, leverage, fastener engagement, torque range, accuracy, handle geometry, and material hardness. Her practical guides help tradespeople and procurement teams select suitable tools, plan controlled tightening, and compare durability without relying on brand reputation alone.