Power Team Hydraulic Puller Field Checklist: 7 Steps for a Stuck Centrifugal Pump
-
Who This Checklist Is For
-
Step 1: Identify What Is Holding the Rotor
-
Step 2: Get the SPX Power Team Hydraulic Pump Manual and the OEM Pump Manual
-
Step 3: Stage the Complete Pulling Kit
-
Step 4: Mount the Puller Straight Before You Apply Pressure
-
Step 5: Apply Hydraulic Pressure in Controlled Steps
-
Step 6: Pull and Inspect the Wear Ring Clearances
-
Step 7: Reassemble With the Same Discipline
-
Common Mistakes to Avoid
If you're reading this because a pump is down and your maintenance plan just went out the window, you're in the right place. I've coordinated emergency repair work for industrial plants since 2017. In my role triaging rush jobs, I've watched more than one 24-hour turnaround turn into a three-day mess. The difference is usually not strength. It's the order of operations before the hydraulic puller comes out. This is the checklist I use when a centrifugal pump or shaft assembly has to come apart fast and clean.
This is not a substitute for your OEM manuals. I'll say that now because hydraulic pulling tools like Power Team hydraulic pullers can produce enough force to do real damage when they're set up wrong. The information below was accurate as of January 2025. Verify current manual numbers before trusting a pressure setting you copied from a tool room whiteboard.
Who This Checklist Is For
Use this when you are facing a stuck rotating assembly, a scheduled pump overhaul, or an emergency where you need to pull an impeller or coupling without breaking it. There are seven practical steps plus a short common mistakes section at the end.
Step 1: Identify What Is Holding the Rotor
I get the urge to set up the puller and hit the pump with full force right away. Stop. A seized rotating assembly is usually caused by one of four things: a failed bearing, a mechanical seal that bonded to the shaft, corrosion on the shaft sleeve, or impeller wear rings that have galled into the casing. Each problem loads the puller in a different direction. If you pull against the wrong component, you can crack an impeller or bend a shaft.
Before choosing a power team hydraulic puller, take a look at the pump and ask what failed first. Did pressure drop off slowly? Check clearances. Did the pump sit idle for months? Check corrosion. Did you hear a high-pitched noise? Check the mechanical seal and wear rings.
Here is the short answer to a common question: what is a wear ring in a centrifugal pump? It is a replaceable ring that keeps the impeller clearance tight while separating the discharge side from the suction side. A stationary ring mounts in the casing or cover, and a mating ring mounts on the impeller. When those rings wear, the pump loses pressure and flow. When they seize, the rotor can lock up completely.
Step 2: Get the SPX Power Team Hydraulic Pump Manual and the OEM Pump Manual
The second step is also the most skipped: open the manuals. For the pulling side, keep a current SPX Power Team hydraulic pump manual with the tooling. That manual gives you the maximum operating pressure, the recommended oil, the ram stroke, and the coupler details. For the pump side, the OEM manual shows which end of the rotor you're supposed to pull from and where the wear ring clearance limits are listed.
In March 2024 I had a plant manager ready to push a shaft out with a 100-ton ram from the wrong side. The OEM drawing showed a retaining ring on the coupling end and a set of wear ring clearances that had to be checked before applying heavy force. We stopped, pulled the assembly from the other end with a smaller hydraulic puller, and saved an impeller worth several thousand dollars. That's not luck. It's reading.
Step 3: Stage the Complete Pulling Kit
Most stalls in emergency hydraulic pulling come from missing pieces, not missing power. Lay everything out before you touch the pump:
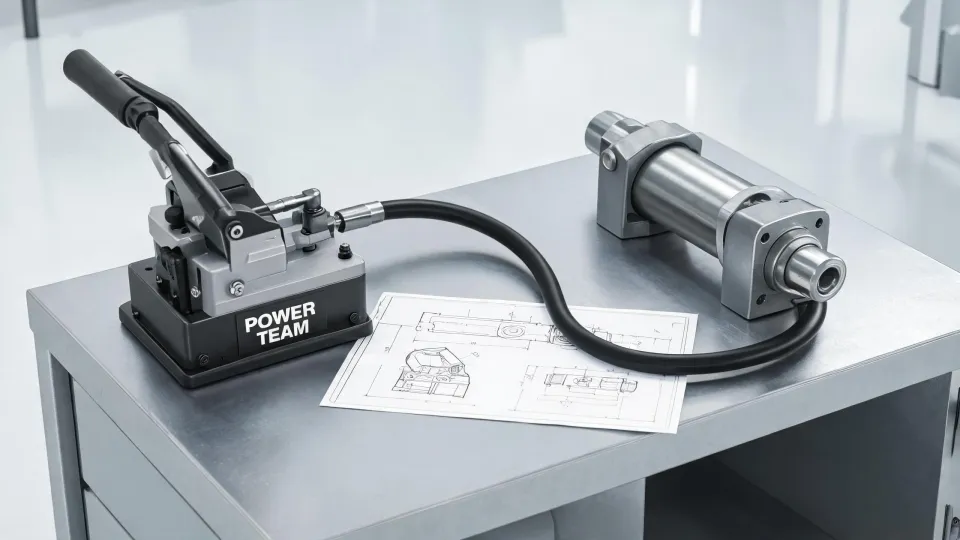
- Power Team hydraulic puller with the right jaw width and reach
- Power Team hydraulic hand pump or air/hydraulic pump with a pressure gauge
- Hydraulic hoses and couplers with quick disconnects in good condition
- Bearing separator and back-up plates for pulling bearings that sit flush
- Six-point sockets, combination wrenches, and a 12v impact wrench for removing guards, bolts, and coupling halves
- Dial calipers or bore gauges for measuring wear ring clearance
- A brass drift or shaft protector so the puller ram does not dig into the shaft end
That 12v impact wrench deserves a mention. A cordless impact wrench in the 12-volt class is enough for most pump coupling bolts and housing bolts, and it saves your energy for the actual pulling. Just don't use it on hydraulic fittings. Tightening O-ring face seal fittings with an impact wrench is a fast way to ruin the sealing surface.
Step 4: Mount the Puller Straight Before You Apply Pressure
In my experience, most failed pulling attempts come from misalignment. A Power Team hydraulic puller should be mounted so the pulling force is in line with the shaft centerline. The jaws or puller legs must sit evenly on the part, not at an angle.
Work in pairs if possible. One person holds the puller frame while the other checks that the ram point is centered on the shaft. If the shaft is keyed, install a piece of brass over the keyway so the puller doesn't dig into a sharp edge. Protect the end of the shaft with a soft cap or a flat plate. Never let the hardened ram point push directly onto a precision shaft thread unless you can accept the damage.
Check the jaw grip every time you add pressure. If a jaw starts to slip, release the pressure and reposition. Trying to lock a slipping jaw with more puller force is how parts get launched.
Step 5: Apply Hydraulic Pressure in Controlled Steps
Once the puller is set, don't go from zero to the max setting. Bring the pressure up slowly. At 25% of the expected force, pause and look for movement. At 50%, listen for unusual sounds and check the frame. At 75%, stop again. If the part moves, keep moving it smoothly until it's free. If nothing moves at 80-90% of rated pressure, stop.
When a part doesn't move, the problem is usually too much friction at the wrong location, not a puller that is too weak. Use the manual to confirm you are using the correct ram size and pressure. In some cases, you'll need to expand the housing or ring with an induction heater while the puller holds a light load. In other cases, the impeller may need to be split before the shaft can be pulled. Don't keep bumping the relief valve and expect a different result.
Step 6: Pull and Inspect the Wear Ring Clearances
After the rotor is free, resist the urge to order every spare part in sight. Start with the wear ring clearances because they explain a lot of pump performance problems. A small amount of wear is normal. Excessive clearance creates internal recirculation, which reduces pressure and can cause cavitation damage.
Measure the ring diameters with a caliper or bore gauge and compare them to the pump service manual. If the OEM manual is missing, the Hydraulic Institute publishes clearance recommendation tables for centrifugal pumps. But the OEM number should always be the final answer. As of 2025, the same guidance is still true: a worn wear ring should be replaced, not machined around.
When installing new wear rings, follow the manual's interference fit specs. Heat or press them in squarely. Don't use a hammer on a cast ring unless the manufacturer specifically says that is okay. After the rings are installed, you should be able to rotate the shaft by hand with a clean drag pattern.
Step 7: Reassemble With the Same Discipline
Emergency repairs fail in the reassembly phase as often as in the disassembly phase. Clean the shaft, replace any O-rings, apply anti-seize only where the manual calls for it, and torque the fasteners to spec. Use a new lock or stake plate where the original setup had one. If the coupling bolts need a specific torque pattern, don't guess.
This is also when the hand tool choices matter. Let me answer one common question now: what is my practical plier wrench review? A good plier wrench has parallel jaws and works nicely for round objects and light-to-medium fastening work. I have one in my maintenance cart and I use it for things like gland nuts and packing retainers. It is not a replacement for a six-point socket and a calibrated torque wrench on pump components. If you find yourself torquing a bearing housing bolt with a plier wrench, slow down. Use the right tool.
Common Mistakes to Avoid
- Pulling the wrong end. Check the pump cross-section first. Forcing an impeller off when the lock nut was never removed is common and expensive.
- Forgetting the mechanical seal. The seal can hold the rotor harder than the bearing in some cases. Loosen the seal before the puller goes on.
- Using a 12v impact wrench on hydraulic fittings. I know it's easier, but it ruins fittings. Use wrenches by hand.
- Relying on plier wrenches for final torque. They grip well, but they don't give you the controlled torque a pump needs.
- Assuming a worn wear ring is only a wear ring problem. If the pump was running dry or handling debris, find the root cause before you reassemble.
The most expensive mistake in an emergency pump repair is pretending you don't have time to check the manual. In reality, the manual is what makes the tight deadline possible.
If you use a Power Team hydraulic puller and an SPX Power Team hydraulic pump manual the right way, you can keep the rotor in one piece, protect the casing, and get the pump back to service in one shift. If this was useful, save the steps somewhere you'll find them when the next pump calls at 2 p.m. That's the moment this checklist is for.

Maren Jorgensen
Maren Jorgensen is an independent hand tool and torque applications analyst covering wrenches, pliers, screwdrivers, hammers, sockets, ratchets, hex keys, and tool sets. She applies ISO 6789-1 torque-tool conformance principles while examining jaw capacity, leverage, fastener engagement, torque range, accuracy, handle geometry, and material hardness. Her practical guides help tradespeople and procurement teams select suitable tools, plan controlled tightening, and compare durability without relying on brand reputation alone.