The $60 Check Valve That Stopped a Power Team Hydraulic Press
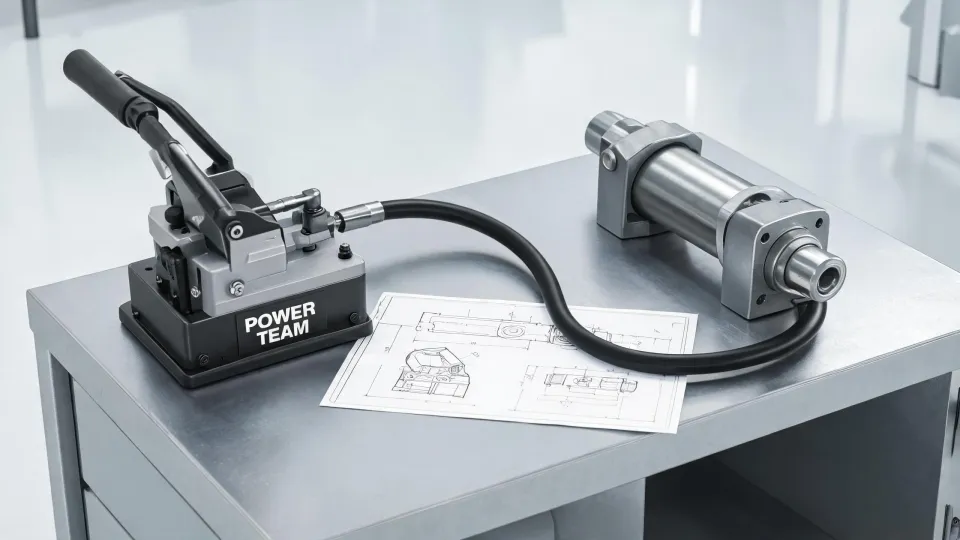
At 7:42 AM on November 12, 2024, my phone buzzed. I was halfway through a cup of coffee when John's name came up. Not a good sign. Nobody calls a hydraulic repair specialist on a Tuesday morning to say everything's fine.
“We've got a press down. No pressure at all.”
That was all he said. No “good morning,” no apology. John runs maintenance at a fabrication plant about forty minutes from my shop. The press in question is a 100-ton Power Team hydraulic unit that runs his main production line. When that press stops, parts stop shipping, and his customers don't care about the reason. They just want their orders.
“Did it lose pressure gradually or drop suddenly?” I asked.
“Dropped like a rock.”
One quick answer, but it already told me where not to look.
Everyone Blames the Pump First
Ask most maintenance teams why a hydraulic press won't build pressure, and you'll hear the same guess: it's the pump. The pump is big, expensive, and central to the whole system. Of course it's the suspect.
The question I wish more people asked is: where did the pressure go?
Pressure doesn't just vanish. It either leaks out or something stops it from building. And in my experience, the pump is the last component to fail—not the first.
I've watched plants lose an entire day swapping out a pump that was perfectly fine, only to discover the real problem later. The pump gets blamed because it's visible, while the real culprit is usually small, cheap, and hidden.
The Milky Clue
When I got to John's plant at 9:07 AM, I started with the routine I've developed over more than 200 emergency calls: first, check the fluid level and condition; second, confirm the Power Team hydraulic pumps are delivering flow; third, watch the pressure gauge through a startup cycle and note what the needle does.
That first step hit us in the face. When John's tech opened the reservoir, the hydraulic oil looked like a milkshake.
Milky oil is one of those signs that means something fundamental is wrong. Healthy hydraulic oil should be translucent. If it turns cloudy, you've got air or water in the system—and that changes everything about how the components behave.
Here's the part that connects to something every homeowner eventually searches for: “how do you remove air from a water pump?”
In house plumbing, the answer is simple. Open a purge valve, let the pump run until water flows smooth, close the valve, done. Bleeding air from a hydraulic system follows the same basic idea, but the stakes are higher. Trapped air in a hydraulic circuit causes spongy cylinder movement, cavitation that can destroy pump internals, and pressure readings that bounce around and make no sense.
What bothered me was the bigger mystery: how was air getting in at all? The reservoir was sealed, and we couldn't find a single external leak. Air was coming from somewhere.
What Was Hiding Behind That Fitting
We traced the system, working from the reservoir down to the cylinder. About six feet from the power unit, we found a fitting that hadn't been opened in years. The bolt was effectively welded in place by rust. Rust does not care about production schedules.
This is where the 2235TiMAX-2 impact wrench from Ingersoll Rand earned its keep. That tool has broken loose more corroded fittings than I can count. A few minutes of hammering, and the line was finally free.
Behind the fitting, we found the answer: a failed check valve about the size of your palm. List price? Roughly $60. It was part of the cylinder's holding circuit—the valve that keeps a loaded press from drifting down when the pump is off.
If you've dealt with a flooded basement, you know the check valve for sump pump systems stops water from flowing backward and cycling through the pump again. Industrial hydraulics borrow the same concept. When a check valve fails open, the load pushes hydraulic fluid back where it came from. In John's case, that reverse flow created suction on the return side, pulling air in past the cylinder rod seals—a little at first, then enough to turn the whole reservoir milky.
Air entered the oil, the oil went milky, and the press lost its ability to hold pressure. The pump was fine. It had always been fine. A sixty-dollar valve took down the line.
The Lesson I Learned the Hard Way
I have mixed feelings about that discovery. Frustration, because it took us two hours of patient tracing to find something that small. Relief, because two hours of good diagnosis beats two days of guessing. But mostly, I thought back to the classic rookie mistake I made in 2016, when I was new to industrial maintenance.
A customer called with the same symptoms: press losing pressure, no visible leaks. Without checking the fluid condition or tracing the circuit properly, I told him he needed a new pump. It seemed like the obvious explanation. I'd talked myself into it before I'd even looked at a gauge.
We swapped the pump. It cost him about $3,600 in parts, plus overnight shipping and nine hours of labor.
The press still wouldn't hold pressure.
Embarrassed and running out of ideas, I went back the next day, dug deeper, and found a stuck relief valve. Thirty minutes to identify. Nine hours and thousands of dollars to get to that point.
That mistake shaped how I work today. When a client calls with a pressure problem, I ask about symptoms first, not parts. And I always check the fluid before I recommend replacing anything.
The Fix
Once we identified the failed check valve, the repair was almost boring:
- Replaced the check valve.
- Bled the air out of the system, starting at the highest point and working down to the reservoir.
- Topped up with fresh Power Team hydraulic oil—ISO 46 viscosity grade, matching the original spec.
- Cycled the press at low pressure to purge any remaining air.
- Brought it up to full tonnage and monitored the gauge for pressure drop.
By 1:47 PM, John's press was running at full capacity. Six hours after his phone call, the line was back in production. The parts that came off that press were loaded onto a truck the next morning.
Now compare that with the alternative: a new pump, overnight freight, two days of labor—and after all that, a press that still wouldn't hold pressure, because we would have been treating the wrong problem.
Actual cost of the repair? $60 for the valve. About $180 for the oil. Plus a few hours of my time.
This is what efficiency really means in this industry. It isn't about turning wrenches faster. It's about finding the right failure the first time—not on the third pass, after thousands of dollars in wrong parts.
What I'd Tell Anyone Running Hydraulic Equipment
If you take one thing from this story, make it these:
- Milky oil is not cosmetic. It means contamination. If your oil looks cloudy, assume air or water is getting in—and find the entry point before it becomes a breakdown.
- Check valves are tiny, cheap, and decisive. Most maintenance programs inspect filters, hoses, and pumps, but the little one-way valves get ignored. Put them on the checklist. A failed check valve in a sump pump gives you a damp basement. A failed check valve in a hydraulic press gives you a dead production line.
- Air in the system is a symptom, not the problem. If you look up “how do you remove air from a water pump,” you'll learn the basics of bleeding. Useful. But don't stop there. If air keeps coming back, you haven't fixed the cause.
- Diagnose before you replace. Before any major component swap, do the fifteen-minute check: fluid condition, filter status, pressure readings. The right diagnosis is the cheapest spare part you'll ever buy.
John's press has run clean since that Tuesday in November. We added check valves to his quarterly maintenance schedule, and he keeps a spare $60 valve in the parts cabinet now. Small price to pay to avoid the next emergency call—especially the ones that arrive before your coffee has cooled.

Maren Jorgensen
Maren Jorgensen is an independent hand tool and torque applications analyst covering wrenches, pliers, screwdrivers, hammers, sockets, ratchets, hex keys, and tool sets. She applies ISO 6789-1 torque-tool conformance principles while examining jaw capacity, leverage, fastener engagement, torque range, accuracy, handle geometry, and material hardness. Her practical guides help tradespeople and procurement teams select suitable tools, plan controlled tightening, and compare durability without relying on brand reputation alone.